
... Ok, so part (read: the vast majority) of the deal with lots of pictures is that I love, love, LOVE my tripod Tony got me for Christmas, and I just wanted to use it! But here goes.
You will need:
2 1/4 cup warm water
2/3 cup oil
1/3 cup honey
4 envelopes active dry yeast
3 tsp salt
1 egg
8 cups of flour+
Preheat your oven to 425 degrees.
1. In a large bowl, mix in water, oil, honey and dry yeast. If you put the oil in your measuring cup, then use the same cup for the honey, the honey just slides out and you don't have a big mess to try to get off your cup.

 2. Let rest 15 minutes. It will look like this at the start:
 Like this along the middle (lava lamp!):
 And like this when it is ready for the next step:
 I like this picture of the yeast foaming and popping:
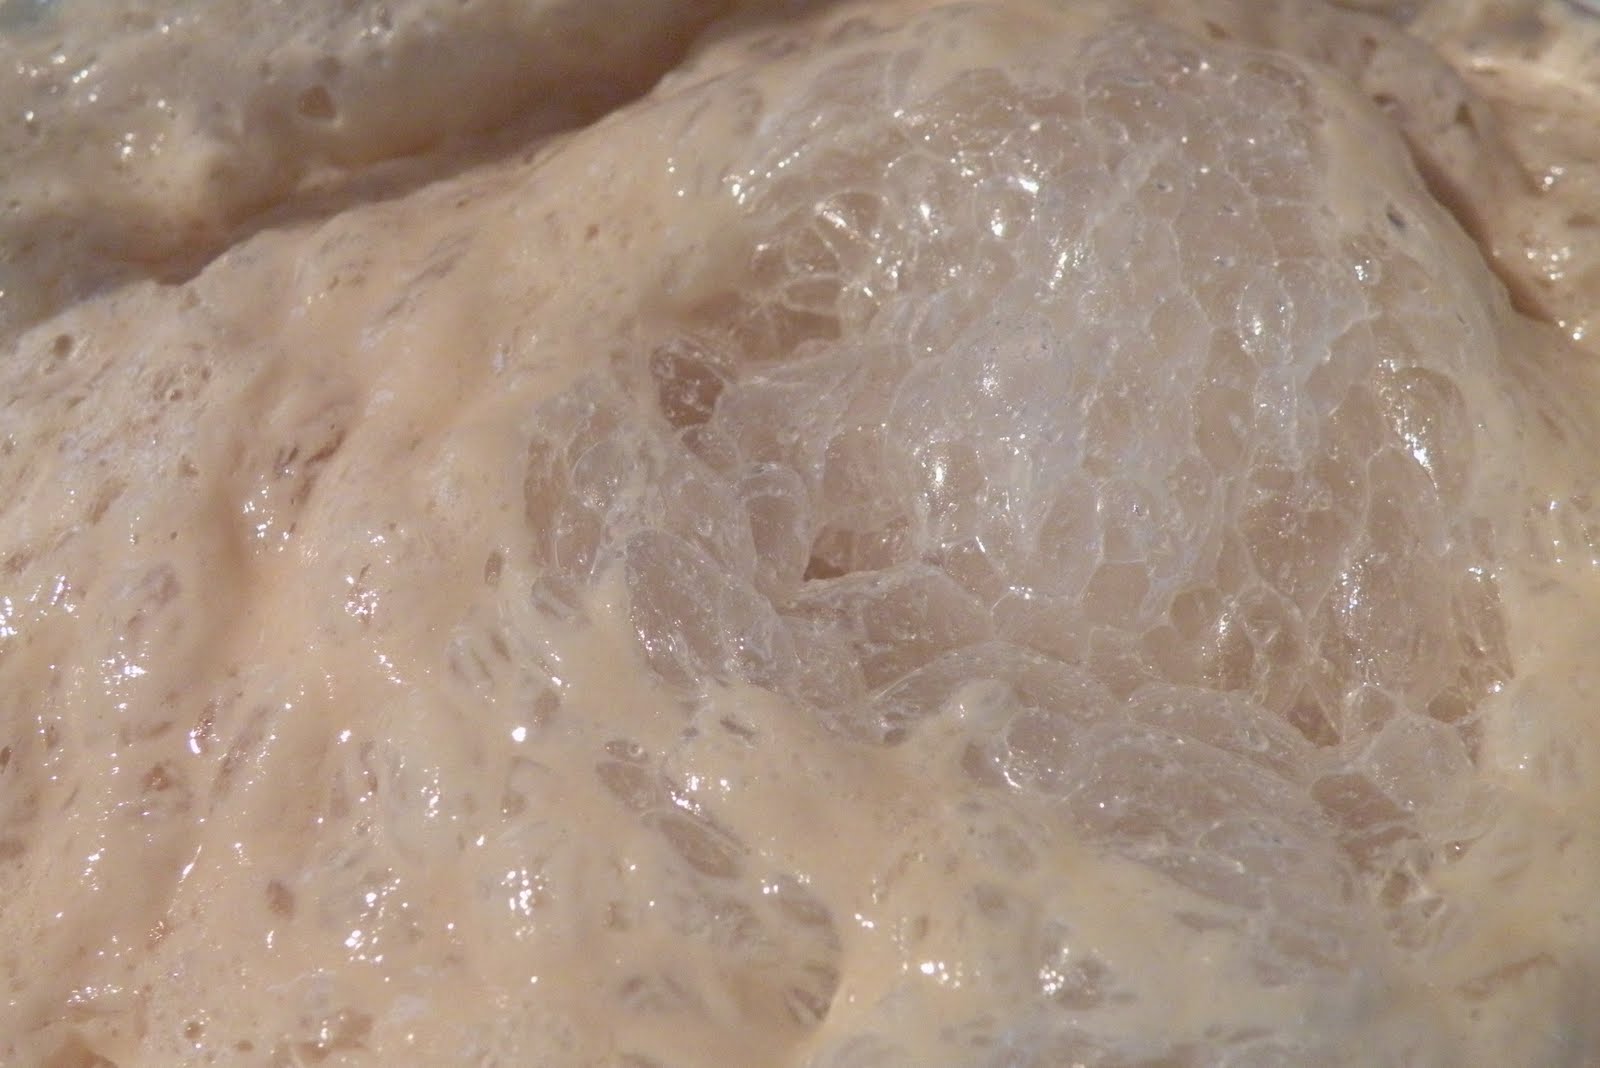 3. Add salt and egg, using your electric mixer to blend well. You can also use a whisk, but who wants to expend that sort of energy?
It is fun to add the salt - the first ingredient after the yeast always makes it whoosh down.

 4. Stir in flour, all eight cups.
 - then you should only fill it most of the way to the top of the cup, since it will be very compacted.
 If you pour the flour out into your cup -
 - fill it to the brim, since the flour will be lightly compacted.
 I usually use my same dinky little hand mixer to mix all the flour in. Just keep on going until it reaches a nice doughy consistency. Notice how the dough drapes down, so it nice and soft and stretchy, but it also sticks together, and is easy to work with, so it will knead nicely.
 5. Now just dump the dough out onto a floured surface. I just spread flour on my counter. If your dough is sticky to handle, sprinkle some flour as you take it out to make it easier on your hands. I rarely use utensils - just make sure your hands are clean and coated in flour, and that makes it so much easier than trying to get a fork or spatula to do what your nimble fingers can do!
 6. Gently shape the dough into a rough oval. It really doesn't have to be perfect or nice and neat. Pull gently at one half to lift it and fold it on top of the other half. Then use the palm of your hand to press down and away. This is kneading the bread. I find this process very soothing. Feel free to be a little rough - it certainly won't hurt the dough!
 Pull... Fold...
 Push! That's all there is to it. If it get too sticky, flip it over and sprinkle more flour, both on the top of the dough and on your counter. Just keep kneading until it looks smooth and feels soft and springy, kind of stretchy and bouncy. This recipe doesn't require a lot of kneading, I usually do the pull, fold, push sequence about ten times.

 Arrange the rolls in the pan so they are barely touching. They will rise to fill in the spaces while they are baking.
 8. Bake the rolls on the middle rack for about 10-15 minutes, or until golden to dark brown.


 4. Stir in flour, all eight cups.
 If you scoop your flour out of the canister -
 - then you should only fill it most of the way to the top of the cup, since it will be very compacted.
 If you pour the flour out into your cup -
 - fill it to the brim, since the flour will be lightly compacted.
 I usually use my same dinky little hand mixer to mix all the flour in. Just keep on going until it reaches a nice doughy consistency. Notice how the dough drapes down, so it nice and soft and stretchy, but it also sticks together, and is easy to work with, so it will knead nicely.
 5. Now just dump the dough out onto a floured surface. I just spread flour on my counter. If your dough is sticky to handle, sprinkle some flour as you take it out to make it easier on your hands. I rarely use utensils - just make sure your hands are clean and coated in flour, and that makes it so much easier than trying to get a fork or spatula to do what your nimble fingers can do!
 6. Gently shape the dough into a rough oval. It really doesn't have to be perfect or nice and neat. Pull gently at one half to lift it and fold it on top of the other half. Then use the palm of your hand to press down and away. This is kneading the bread. I find this process very soothing. Feel free to be a little rough - it certainly won't hurt the dough!
 Pull... Fold...
  Push! That's all there is to it. If it get too sticky, flip it over and sprinkle more flour, both on the top of the dough and on your counter. Just keep kneading until it looks smooth and feels soft and springy, kind of stretchy and bouncy. This recipe doesn't require a lot of kneading, I usually do the pull, fold, push sequence about ten times.
7. Spray two or three round cake pans with non-stick spray. If you prefer, you can melt butter to coat the pans. Pinch off a small amount of dough, roll it gently (again, doesn't have to look perfect) and put it in the pan. I usually do about golf ball size with this recipe, but bigger would work too.
Again, if the dough starts to stick to your fingers where you are pulling it off, just dab some flour on it. At this stage it doesn't take a lot, just a little sprinkle.
 Arrange the rolls in the pan so they are barely touching. They will rise to fill in the spaces while they are baking.
  8. Bake the rolls on the middle rack for about 10-15 minutes, or until golden to dark brown.
 Enjoy!

No comments:
Post a Comment